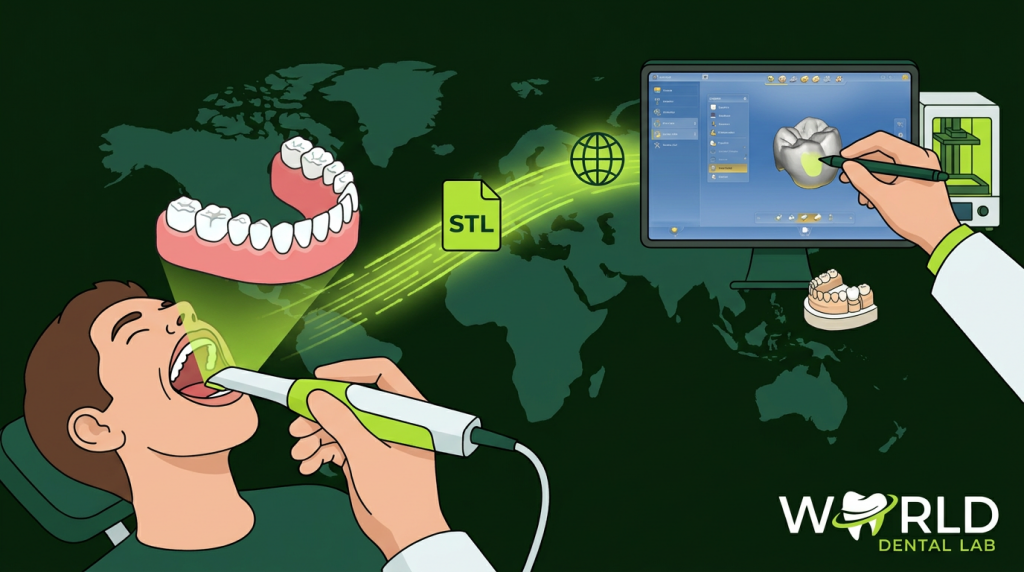
Intraoral scanners have removed one of the biggest practical barriers to offshore dental lab work: the wait for a physical impression to cross an ocean. When your case is a digital file, geography stops mattering. A scan taken at 9 AM can be in production at a lab in Vietnam or China by the end of the business day.
But sending digital cases internationally still requires a clear workflow. Files need to be in the right format. Case instructions need to be unambiguous. Communication protocols need to be established before the first case goes out the door.
This guide covers everything: file formats, transfer platforms, how to write effective case instructions, and what to expect at every stage of the workflow.
Step 1: Export Your Scan in the Right Format
The standard file format for dental lab work is STL (Standard Tessellation Language) or its successor OBJ. Most intraoral scanners can export both. The key is ensuring the lab receives open-format files they can import into their CAD software, not proprietary files locked to a scanner ecosystem.
Scanner Export Formats by Brand
| Scanner Brand | Proprietary Format | Open Export Format | Notes |
|---|---|---|---|
| 3Shape TRIOS | .3OXZ | STL, OBJ, DCM, PLY | Export via 3Shape Communicate |
| Align iTero | .iTero | STL, OBJ | Requires iTero portal login |
| Carestream CS 3600 | .CAD | STL | Direct STL export supported |
| Planmeca Emerald | .plmxml | STL, OBJ | Export via Planmeca Romexis |
| Dentsply Primescan | .dxd | STL, OBJ, PLY | Export via CEREC software |
| Medit i700 | .mxm | STL, OBJ, PLY | One-click STL export |
For most overseas labs, STL is the universal request. Some labs also accept OBJ or PLY if you need color scan data. When in doubt, ask your lab which formats their CAD system imports natively.
For a deeper look at STL file specifications and quality requirements, see our complete dental STL file guide.
Step 2: Check Your Scan Quality Before Sending
The most common cause of remakes in digital workflows is not lab error — it’s inadequate scan data. Before you compress and send, review the scan for these five quality indicators:
- Preparation margin visibility: The margin line must be fully captured in the scan. Any gap in the margin data forces the technician to estimate, which will produce a poor fit. Rescan if any part of the margin is not clearly defined.
- Occlusal coverage: The opposing arch must include at least 10mm beyond the preparation in all directions. Missing occlusal data leads to bite registration errors.
- Buccal bite scan: Ensure the bite scan covers the full quadrant in occlusion, not just 2–3 teeth. This is often the weakest part of a case submission.
- Gingival tissue displacement: If the margin is subgingival, verify that retraction and hemostasis were sufficient before scanning. Tissue over the margin will produce an unusable scan.
- No scan artifacts: Check for holes, jumbled triangles, or misaligned patches in the mesh. These indicate stitching errors and will require the technician to reconstruct geometry, reducing accuracy.
See our guide on digital dental impressions for the clinical technique that produces scan-ready preparations consistently.
Step 3: Prepare Your Case Instructions
A digital file without clear instructions is like a prescription without a diagnosis. The technician needs to know exactly what you want. The more specific your instructions, the fewer back-and-forth messages, and the faster your case moves through the lab.
Essential Case Sheet Information
| Field | What to Include | Example |
|---|---|---|
| Tooth number(s) | Universal numbering (US) or FDI | #19 (FDI: 36) |
| Restoration type | Crown, bridge, veneer, implant crown | Full coverage crown |
| Material | Specific material and generation | Monolithic zirconia, 3Y-TZP |
| Shade | System + shade value | Vita Classical A3, stained to match adjacent |
| Occlusion | Contact preference | Light contact in centric, no protrusive contact |
| Contact points | Tight, medium, or light | Medium contact mesial and distal |
| Connector (bridge) | Size specification if relevant | Minimum 16mm² connector cross-section |
| Implant info | System, platform, connection type | Straumann BL 4.1mm, RC internal hex |
| Special notes | Anatomy preferences, patient notes | Patient is a bruxer — heavy anatomy, flat cusp morphology |
| Required delivery date | Date in lab time zone | Needed by July 22 (next appointment July 24) |
Step 4: Choose a Transfer Platform
There are several ways to transfer scan files to an overseas lab. Each has tradeoffs in speed, security, and ease of use.
Option A: Lab’s Own Portal
Most professional labs maintain a secure web portal for case submission. You upload STL files, complete an online case form, and submit. The lab receives an automatic notification and can begin work immediately. This is the most organized option and creates a digital case record with timestamps.
Option B: 3Shape Communicate
If you use a 3Shape TRIOS scanner, 3Shape Communicate lets you share cases directly from the scanner software to any connected lab. The lab receives a notification, downloads the case, and can respond with questions or send back design proposals for approval before milling. This is the most seamless option for 3Shape users.
Option C: Email with Compressed Files
STL files for a single crown are typically 2–8 MB — easily emailed. Zip the scan files with the case instruction sheet and send directly to the lab’s case intake email. Simple, universal, no portal login required. Works well for low-volume practices.
Option D: WeTransfer / Dropbox
For larger cases (full arch, multiple units, CT scans), cloud file sharing is more reliable than email attachments. WeTransfer free tier handles up to 2 GB; Dropbox shared folders work well for ongoing relationships with a single lab.
Step 5: The Lab Workflow After Receiving Your Scan
Understanding what happens on the lab side helps you set realistic expectations and communicate more effectively when issues arise.
- Case intake and review (1–2 hours): The lab logs your case, reviews the scan quality, and flags any issues. If the scan is inadequate, you should receive notification within the same business day.
- CAD design (1–4 hours depending on complexity): A technician opens your STL files in their CAD software (typically exocad or 3Shape), designs the restoration, and saves the design file. For complex cases (full arch, multi-unit bridges), design may take 4–8 hours.
- Design approval (optional but recommended for complex cases): Some labs offer to send you a design screenshot or virtual wax-up for approval before milling. Request this for anterior aesthetic cases.
- Milling (20–45 minutes per unit): The CAD file is sent to a milling machine. For zirconia, the pre-sintered disc is milled oversized to account for sintering shrinkage.
- Sintering (2–8 hours): The milled zirconia undergoes a high-temperature firing cycle that hardens the material to full density. This step cannot be rushed — sintering profiles are material-specific and deviation causes porosity and reduced strength.
- Finishing and characterization (30–90 minutes): The sintered restoration is polished, stained if requested, and glazed. Final QC check against the case sheet.
- Packing and dispatch: Cases are packed individually in protected boxes, documented with your case information, and handed to DHL Express. Most labs dispatch same-day for cases completed before their cutoff time (typically 5 PM local time).
Typical Timeline: Digital Case to Your Hands
| Stage | Time |
|---|---|
| Scan → Lab receives | Immediate (digital transfer) |
| Lab review and CAD design | Same day or next morning |
| Milling + sintering + finishing | 1–2 lab days |
| DHL Express transit (Asia → US) | 3–5 business days |
| Total: scan to delivery | 5–8 business days |
Compare this to sending a physical impression: add 3–5 days for outbound shipping before lab production even begins, meaning total turnaround is typically 10–14 business days.
Common Problems and How to Avoid Them
| Problem | Cause | Prevention |
|---|---|---|
| Poor marginal fit | Margin not fully captured in scan | Retract tissue, rescan if any margin gap |
| Wrong shade | Shade not communicated or ambiguous | Send shade photo; specify system and value |
| Occlusion issues | Weak or incomplete bite scan | Re-do bite scan if coverage is less than full quadrant |
| Interproximal contact too tight | Lab default is tight; not specified otherwise | Include contact preference explicitly in case notes |
| Wrong implant connection | System/platform not specified | Always include implant system name and platform size |
Frequently Asked Questions
Can I send intraoral scan files directly to an overseas dental lab?
Yes. Most overseas labs accept STL, OBJ, and PLY files via email, their own case portal, or cloud transfer services. Export open-format files from your scanner software (not the proprietary format) and verify the lab’s preferred format before sending the first case.
What file format do dental labs use?
STL (Standard Tessellation Language) is the universal standard. OBJ is increasingly common for cases requiring color data. Some labs also accept PLY and AMF. Avoid sending proprietary scanner formats (.3OXZ, .iTero, .dxd) unless the lab has confirmed compatibility.
How long does it take to get a crown from an overseas lab using digital files?
For most crowns, 5–8 business days from scan to delivery. Lab production takes 1–2 days; DHL Express transit from Asia is 3–5 business days. Rush production (24–48 hour completion) is available at most labs for an additional fee of $10–$25/unit.
What happens if my digital scan is rejected by the lab?
A quality lab will notify you within hours of receiving an inadequate scan, identify the specific problem (incomplete margin, missing bite scan, etc.), and request a rescan. They should not proceed to production with a scan that will produce a poor-fitting restoration. Ask your lab about their scan review protocol before your first case.
